
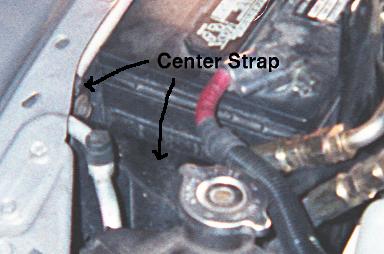
The bracket consists of a base plate that sits beneath the battery on the tray, two risers providing the vertical support, a strap across the top of the two risers, and a wrap-around center strap in the middle that is bolted inside the battery tray behind the battery. It is rigid enough to prevent undue flexing. I designed the bracket to allow the battery to sit in its OEM position (albeit 1/8" higher) and to keep the filters a reasonable distance from the battery.
After I measured everything several times, slept on them for a night or two, re-measured and verified the final figures, I went to a local welding shop. From the three drawings I made, they fabricated the bracket. It needed only two minor nips to fit in the bottom of the battery tray. They used 0.1" steel (seems to be a standard gauge). They welded all edges of each joint. I had originally specified 1/8" steel, but what they used seems strong enough.
After I got home with the bracket, I dremeled off enough of the front (inner) edge of the battery tray so the bracket would sit nicely on the bottom of the tray, with the risers extending beyond the edge. Then I proceeded to measure the location of the bolts holding the side of the tray to the fender, marked where they should be, and drilled. Once the bracket was bolted in place, I used a vise-grip to hold the filterless Amsoil mount in place to be sure it was low enough to let the hood close. I then marked those four holes and drilled them; one of the holes needed to be extended, as my center punch didn't work too well. This, of course, involved installing and removing the bracket numerous times!
Once the holes were drilled and the bracket looked like it would fit OK, I removed it and prepared to paint it. I dremeled off the nastiest blemishes, and wire-brushed the whole thing. Then I cleaned it with lacquer thinner. To prime it, I used a can of standard etching primer, hoping that the paint would last longer. I then applied many thin coats of gloss black enamel over several days. (I could have put the bracket in a 120 degree oven, but chose to let it dry naturally.) I ensured that the bolt holes were primed and painted as well.
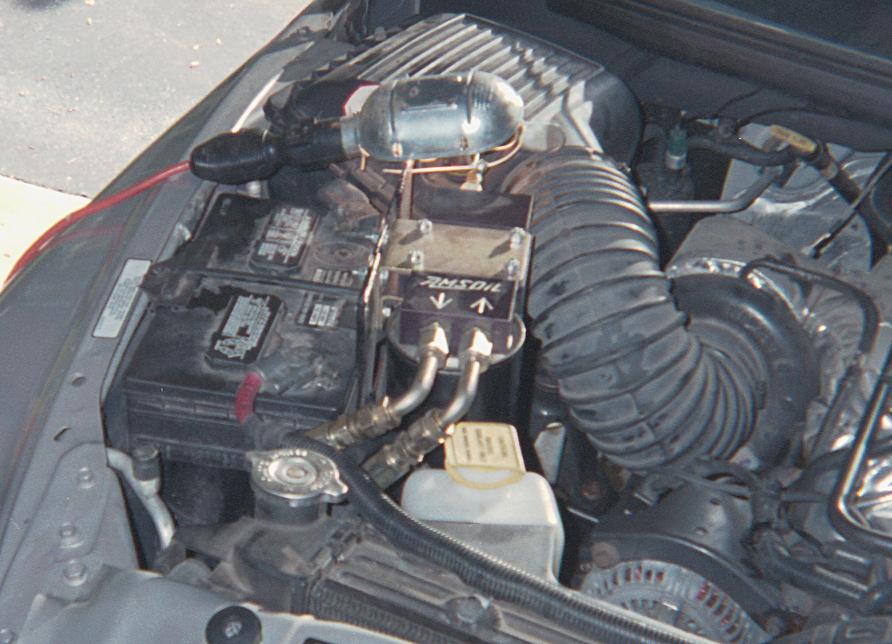
After I let the paint dry for a week or more (no, I didn't sit and watch that spectacle), I installed the bracket, figured out where to route the hoses, made the hoses, bolted it up, drained the oil, filled up with Amsoil 15/40 Marine/Diesel, filled the filters, mounted them, started the engine and found no leaks. This, of course, took a couple weeks, as I decided I needed a couple pairs of right-angle fittings. Bolting the Amsoil unit onto my bracket required spacers on the thin part of the top strap; without them, the bracket did warp.
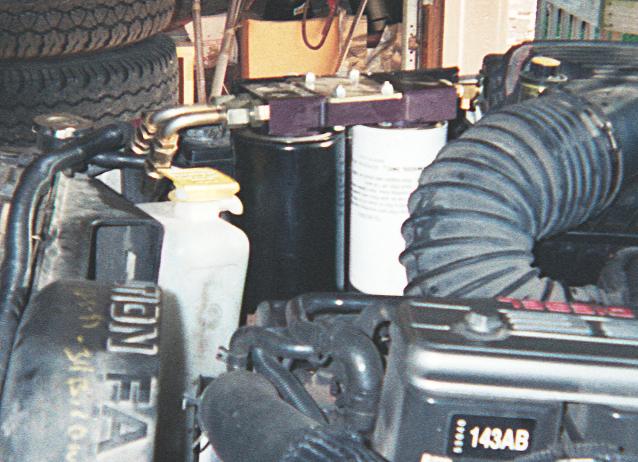
I knew it was too good to be true. The sampling valve leaked, until I tightened with a wrench. I'd like to replace it with a ball-valve. And one or another fittings on the adapter plat leaks a bit. In hindsight, I think I would route the hoses down alongside the radiator overflow tank, over or under the frame, then back and up to the adapter plate without using right-angle fittings on the adapter plate. I may yet do that. At the time, I figured routing the hoses under the filters across to the adapter would work. Silly me.
The other problem is getting the adapter plate screwed on tight enough. The destructions say to turn it one full turn after the o-ring contacts the base. This is much easier said than done.
This prototype is actually about 1/4" too tall; the hood barely makes contact with it when closed. I've adjusted the drawings to avoid this problem.
The oil leak wasn't too bad, though. I only lost a quart or so in 4000 miles. At least there are a few parts of the truck that won't rust too soon!
The only other flaw in this design that I can see is that the filter mount must be unbolted from the bracket in order to remove the battery clamp. But considering that there's almost no other place to put the unit, I'll live with it!
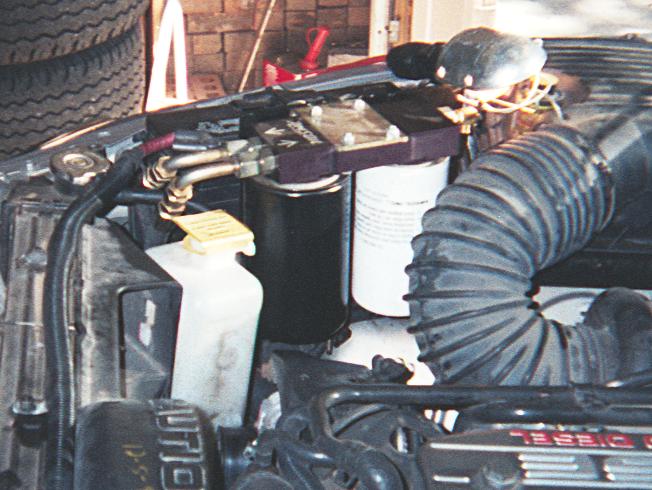
So, enough of this dry, featureless text. On to the pictures. The picture quality is about what one might expect from a cardboard camera. I annotated a couple to point out things of import. The pictures are views of the bracket and filter unit. There is one 3D drawing of the bracket, so you can get an idea of just what it looks like. You can click on any image to see a larger version of it.


Base drawing
Center Strap drawing
Risers and Top Strap drawing
ADROFMB Rev. 02, 7/13/2002; added drawings ADROFMB Rev. 01, 7/12/2000; send corrections and comments to Neal P. Murphy